Tuesday, August 30, 2011

Tasty Tuesday: Greek Shrimp Saute

I made this yummy Greek-inspired Shrimp Saute with basil, olives, and feta. Best of all, it's a very quick meal. I served mine over some whole-wheat couscous with a salad on the side. A great weeknight dinner, and an easy break from chicken over and over and over again! 


Greek- Style Shrimp Saute


from:  
2009

4 tbsp Light Greek Vinaigrette dressing
1 1/2 lbs peeled and de-veined shrimp
1 cup grape tomatoes, halved
12 chopped pitted kalamata olives
1/4 cup chopped fresh basil
1 1/2 oz  crumbled reduced fat feta  cheese
I added: 1/2 cup chopped bell peppers and onions
Garnish: Chopped Fresh Basil and lemon wedges

Heat a non-stick saute pan on medium-high heat. Spray with cooking spray. Saute shrimp in 1 tbsp vinaigrette until done, stirring frequently. Remove shrimp and keep warm. Add tomatoes and rest of the vinaigrette to the pan, along with the olives and basil.  Cook about a minute until tomatoes are warm. Toss with shrimp and cheese. Serve over cooked orzo or couscous, garnished with basil and lemon wedges.


Very easy and very yummy! This one is definitely in the regular rotation!

Monday, August 29, 2011

Free Printable- Three Part To Do List

I love to make lists. I definitely have the list making gene. Most tables, notepads, and paper scraps in my house have some form of a to-do list on them. Do Today. Things to buy. Don't forget. Long range goals, projects to get done, blog ideas.. they all find their way onto a to-do list.

In talking with one of the girls at work, she's a list maker too. And so to help us both out, I decided to create a notebook that can fit all those lists into one. Sized to fit a half sheet of 8 1/2" x 11" paper, it's economical to print and easy to store in a purse or on a bedside table.

Because sometimes I finish things on one list well before I finish things on another, the pages are cut into three sections that are spiral bound together.

I'll be sharing a tutorial on how I put the notebook together later.

Until then, here's the printable to get you started. Simply save as and print full size on your printer at home. Cut in half to get two pages.

Hope you enjoy and this makes your life a bit more organized!


Sunday, August 28, 2011

Weekend Adventures

I hope all of you in the path of Irene are staying safe!

This is what I'm up to this weekend!


I'm working on using up this can of primer by painting the walls of the upstairs landing.

Slowly but surely, I will eliminate all the baby-poop colors that came with this house!

I'm also working on some projects for Sissy to help her study!

What are you up to this weekend?

Thursday, August 25, 2011

Mis-Adventure: Cleaning the oven

Somehow, I managed to make it the past almost 10 years of living on my own without cleaning my oven. Until tonight.

I made cheesecake for Prince Charming's birthday earlier in the week. (And I was so distracted making sure I didn't poison him this is the only photo I got with my phone)

 Having a brand new spring form pan, I didn't bother to line the bottom like both the recipe and University of Mom told me to.  So I guess it leaked onto the bottom of my oven. oops. No wonder it smelled so good baking.

Fast forward to tonight, when I decide I had better clean the oven before I cook in it tomorrow. So not knowing any better, I flipped the latch on the door, turned the dial, and let 'er rip.

The poor dog and I have now retreated upstairs with all the windows open to escape the smoke. Because apparently a "self cleaning oven" means it BURNS everything off the bottom. And there was some crusty stuff on the bottom.

Lessons from the University of Mom:

1. Listen to what Momma says. She's usually right.
2. Clean the oven before you clean the oven.

On tap for tomorrow: Fabreeze the entire house.

Friday, August 19, 2011

This Just Pinned

I think I'm FINALLY getting the hang of Pinterest. I was slow at first, but now I'm loving it! It's definitely easier to pin things you see if you install the "Pin It" button, which I just did.

I thought I would share a few of the things I've pinned recently:


I play Bunco with a group of neighborhood girls once a month and this would be an awesome addition to our Bunco Bag of Goodies!


I'm in love with the white surround and hearth on this fireplace. I'm definitely making over my fireplace this winter and using it! This would be an awesome addition.


My Mom has a cross-stitch of this poem that hung in my nursery. Tons of people I know just had babies and are pregnant, so this is a perfect reminder for the new Mommas to cherish their babies while they're small! As my Mom can tell you, they grow WAY too fast! Wouldn't it be great as part of a gallery wall in a nursery?

What have you pinned lately?

Thursday, August 18, 2011

E-design: Sissy's Home Office

My Sissy started law school this week. And I am SO stinkin' proud of her. One of the things she needed was a place to study, write papers, and read all those books.

She loves the look of Ballard Designs, so that was the perfect inspiration for her office. We couldn't do it on that kind of budget, of course. Sissy is now a starving student.
Source

It started with an inspiration board and a space plan.


Then, Sissy and Mom went shopping while I had to work.

Here's the office as of now:


I have lots of plans for finishing touches!

Wednesday, August 17, 2011

The Mis-tint Paint Challenge

I have an idea. Call me crazy, but wouldn't it be interesting to see what you could create if you had to use a surprise mis-tint paint in your house? I think I'm watching too much reality TV. I was starting to prime the dining room floor, determined to use up what I had, when I got to thinking about oops paint.

Here's what I'm thinking:

Get someone you know to go grab the first can of mis-tint interior paint they can find. No looking at the color, and you don't get to be in the store. Once you get it, you have to incorporate it into your home. Maybe it's a gallon and you paint the powder room. Maybe it's a test sample, and you create custom artwork or paint a chair.  No matter what, you have to use it in your home.

source

I think it'd be a challenge to my creativity- to grow as a designer by using a "surprise ingredient" that you may not even personally like at the beginning. How can I incorporate this ingredient into my home, and make it something I will love.

Who's with me? Any takers? Is this an interesting idea, or am I totally insane?

Tuesday, August 16, 2011

Tasty Tuesday: Publix Party Chicken

You know last week, I said we eat a lot of chicken. It's very true, and I'm back again today with another chicken recipe. 


This one comes from my Mom, who cut it out of a Publix flyer.


Ingredients:


3 Tbsp Butter
1/4 cup flour
4 Chicken breasts
pepper
1 can cream of chicken soup
1/2 cup mayonnaise
1 1/2 cups Panko bread crumbs
1 cup shredded cheese


Spray a 9 x 13 baking dish with cooking spray. Preheat oven to 425. I recommend cutting the chicken into bite-size pieces. ( I didn't , and wish I had, so do!)


Cut the butter into pieces, and let it sit at room temperature until soft.


Put flour and pepper in a  ziploc bag, and add chicken. Shake to coat. Put the floured chicken in the dish.


In a bowl, combine the soup and mayo, and spread over the chicken.


In the butter bowl, add the Panko crumbs and cheese, and mix with a fork or your hands until it's crumbly like wet sand.  Put this on top of the sauce on the chicken.


Cover with foil and bake 10 minutes. Take the foil off and bake 10-15 more minutes until golden brown and chicken is cooked through.


 I served this with steamed asparagus, but Publix recommends broccoli salad. I'm sure any green veggie would be great, or even just a good salad. 


Overall, it was a very yummy dish that reminded me of poppyseed chicken. It definitely made me feel Southern to be eating chicken with cream of soup, mayo, and cheese. 

 Leftovers kept well in the fridge, and I'm sure it would also freeze well to be cooked later.  Best of all, it came together quickly and was made from mostly pantry ingredients. I had everything but the chicken in my fridge from other things I've made/ make. 
I hope you make this and enjoy!  

Recipe source: Publix.com


Monday, August 15, 2011

Master Bedroom: European Pillow Shams with Flange

I LOVE European shams on beds. They add such a nice finished look without being 10,000 things to take off when you want to go to sleep. (Which is a plus if you have a Mr. in the house. They don't seem to understand decorative very well.) Also, Euro shams are a great size for propping up in bed to read.  So they were a definite must-do for my bedroom makeover.

First, I washed and dried my fabric. If you don't wash before sewing, your piece just became dry clean only.

While I was waiting on the fabric, I did my math.

European pillows are 26" x 26" square. To make sure the pillows were nice and puffy, I wanted them to squish inside my shams. Therefore, my space for my pillow is 24 x 24. I wanted a 3" flange around the outside.

Therefore, my finished dimensions of my sham would be 3" flange + 24" insert size + 3" flange = 30". I added 1/2" on each side for a seam allowance, giving me 31" x 31" for my front piece.

Now, I needed to figure out the back. I wanted an envelope closure that overlapped in the back. I decided on a 2" overlap.

So 3" flange + 12" (half of the insert) + 2" for front hem + 1/2" seam allowance = 17 1/2" wide x the same 31" high.

Then my last piece needed to be 19 1/2" wide to give me a 2" overlap.

Next, I ironed my fabric to get it nice and flat.

Now, to cut my pieces. I have a bit of trouble with straight lines, so I opted to let the fabric do it for me.

I laid it out flat on my table, measured 31", and cut a small notch.


Rip across to get a 31" tall piece. Measure across the width 31", cut, and rip again to get 31" wide.

This is your front. Label and set aside.

Repeat the measuring and ripping to get your three pieces.


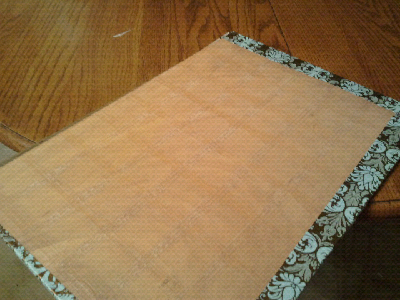
 For both back pieces, fold one edge over 1", and iron.
 Fold over again, and iron again to make a double hem.


Sew along the front with a 3/4" seam allowance to secure the hem. It will look like this from the back:

 Repeat with the second back piece.

 Now it's time to assemble the pillow. Lay the front piece on your table, face up.

Lay the 17 1/2" wide piece face down on top of the front, lining up the edges.

Lay the remaining piece face down on top of the other two, again lining up the edges.

Sew along the edge, using a 1/2" seam allowance.


Turn your sham inside out and press.

Top-stitch all the way around, 3" from the edge to create the flange.

Stuff your pillows in and enjoy!


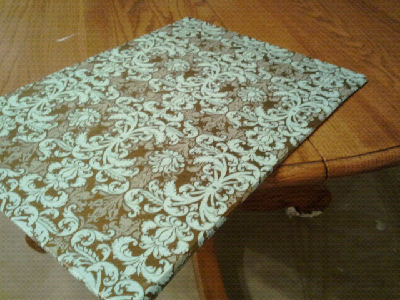
I love the pop of floral and green they add to the room! 


This method can easily be adapted for any size pillow, just change the sizes based on your insert.

Friday, August 12, 2011

Summer Sangria

School may be starting, but that doesn't mean Summer is over! It's still hot as ever here in Georgia, and I am in love with this super-easy Sangria recipe.  Originally from Weight Watchers, I have taken this to a day on the river and to an outdoor concert. Super easy and super yummy!

Summer Sangria:

2 cups red wine
2 cups diet cranberry-raspberry juice drink
1 cup diced strawberry
1 cup diced apple

Mix all ingredients together in a large pitcher and refrigerate at least an hour to become cold and let the flavors meld. Serve.

Yields 8 4-oz servings.


Great for an evening on the patio too!

Wednesday, August 10, 2011

A Glimpse Inside Giveaway Winners Announced!

Allison at A Glimpse Inside picked the winners of the giveaways for the 1,000 follower celebration.


1000 Follower Celebration


One lucky person could win a credit to my Etsy shop, Stapleton Boyd Designs.

Was it you?

Go check it out and see!


Mis- Adventure- Placemat Fail, part 2

*** Apologies for today's late post. The day got away from me at work, and I didn't finish this until late today! Thank you for reading!***

Several months ago, I fell in love with some placemats at One Kings Lane. Of course I can't find them now, but I think they were from Dransfield and Ross.  I did save this image from when I found them originally.


Hexagonal, Leather, Nailhead trim. I was in LOVE with everything about them. Well, except the pricey price tag.  So I set out to DIY some.


My first attempt was a total failure.  You can read about it here.
My second attempt was too, although I'm getting better.

I decided they needed to be hardboard like placemats, with a decorative top and nailhead trim, with a hard coating and cork back. Sounds easy right?

Off I went to Lowe's and found the 1/8" plywood project panels. I had Prince Charming cut them down for me to 12x24 rectangles.

Then I took some wrapping paper and ModPodge Hardcoat.


I put a layer of Hardcoat on the plywood, then laid my wrapping paper down. Then I smoothed it out with a credit card.  Half a bottle of Hardcoat later, I still don't have that built- up finish I'm looking for.

Then I read this post by Jen at Tatertots and Jello.  Lightbulb!

I need resin. And I think I"m going to try this with actual Masonite, some studs designed for clothing, and a pour on resin. 


Stay tuned and hopefully it will work this time!!!!


Catch a Glimpse Button


Photobucket


LinkWithin

Related Posts with Thumbnails